

Branding: setting your own accent colour and logo
There are 2 ways to change the accent colour in the settings page
Enter the RGB code of the colour
Upload an image, after which SlideMagic extracts its colour profile (convenient way to extract your corporate colour from a logo image for example)
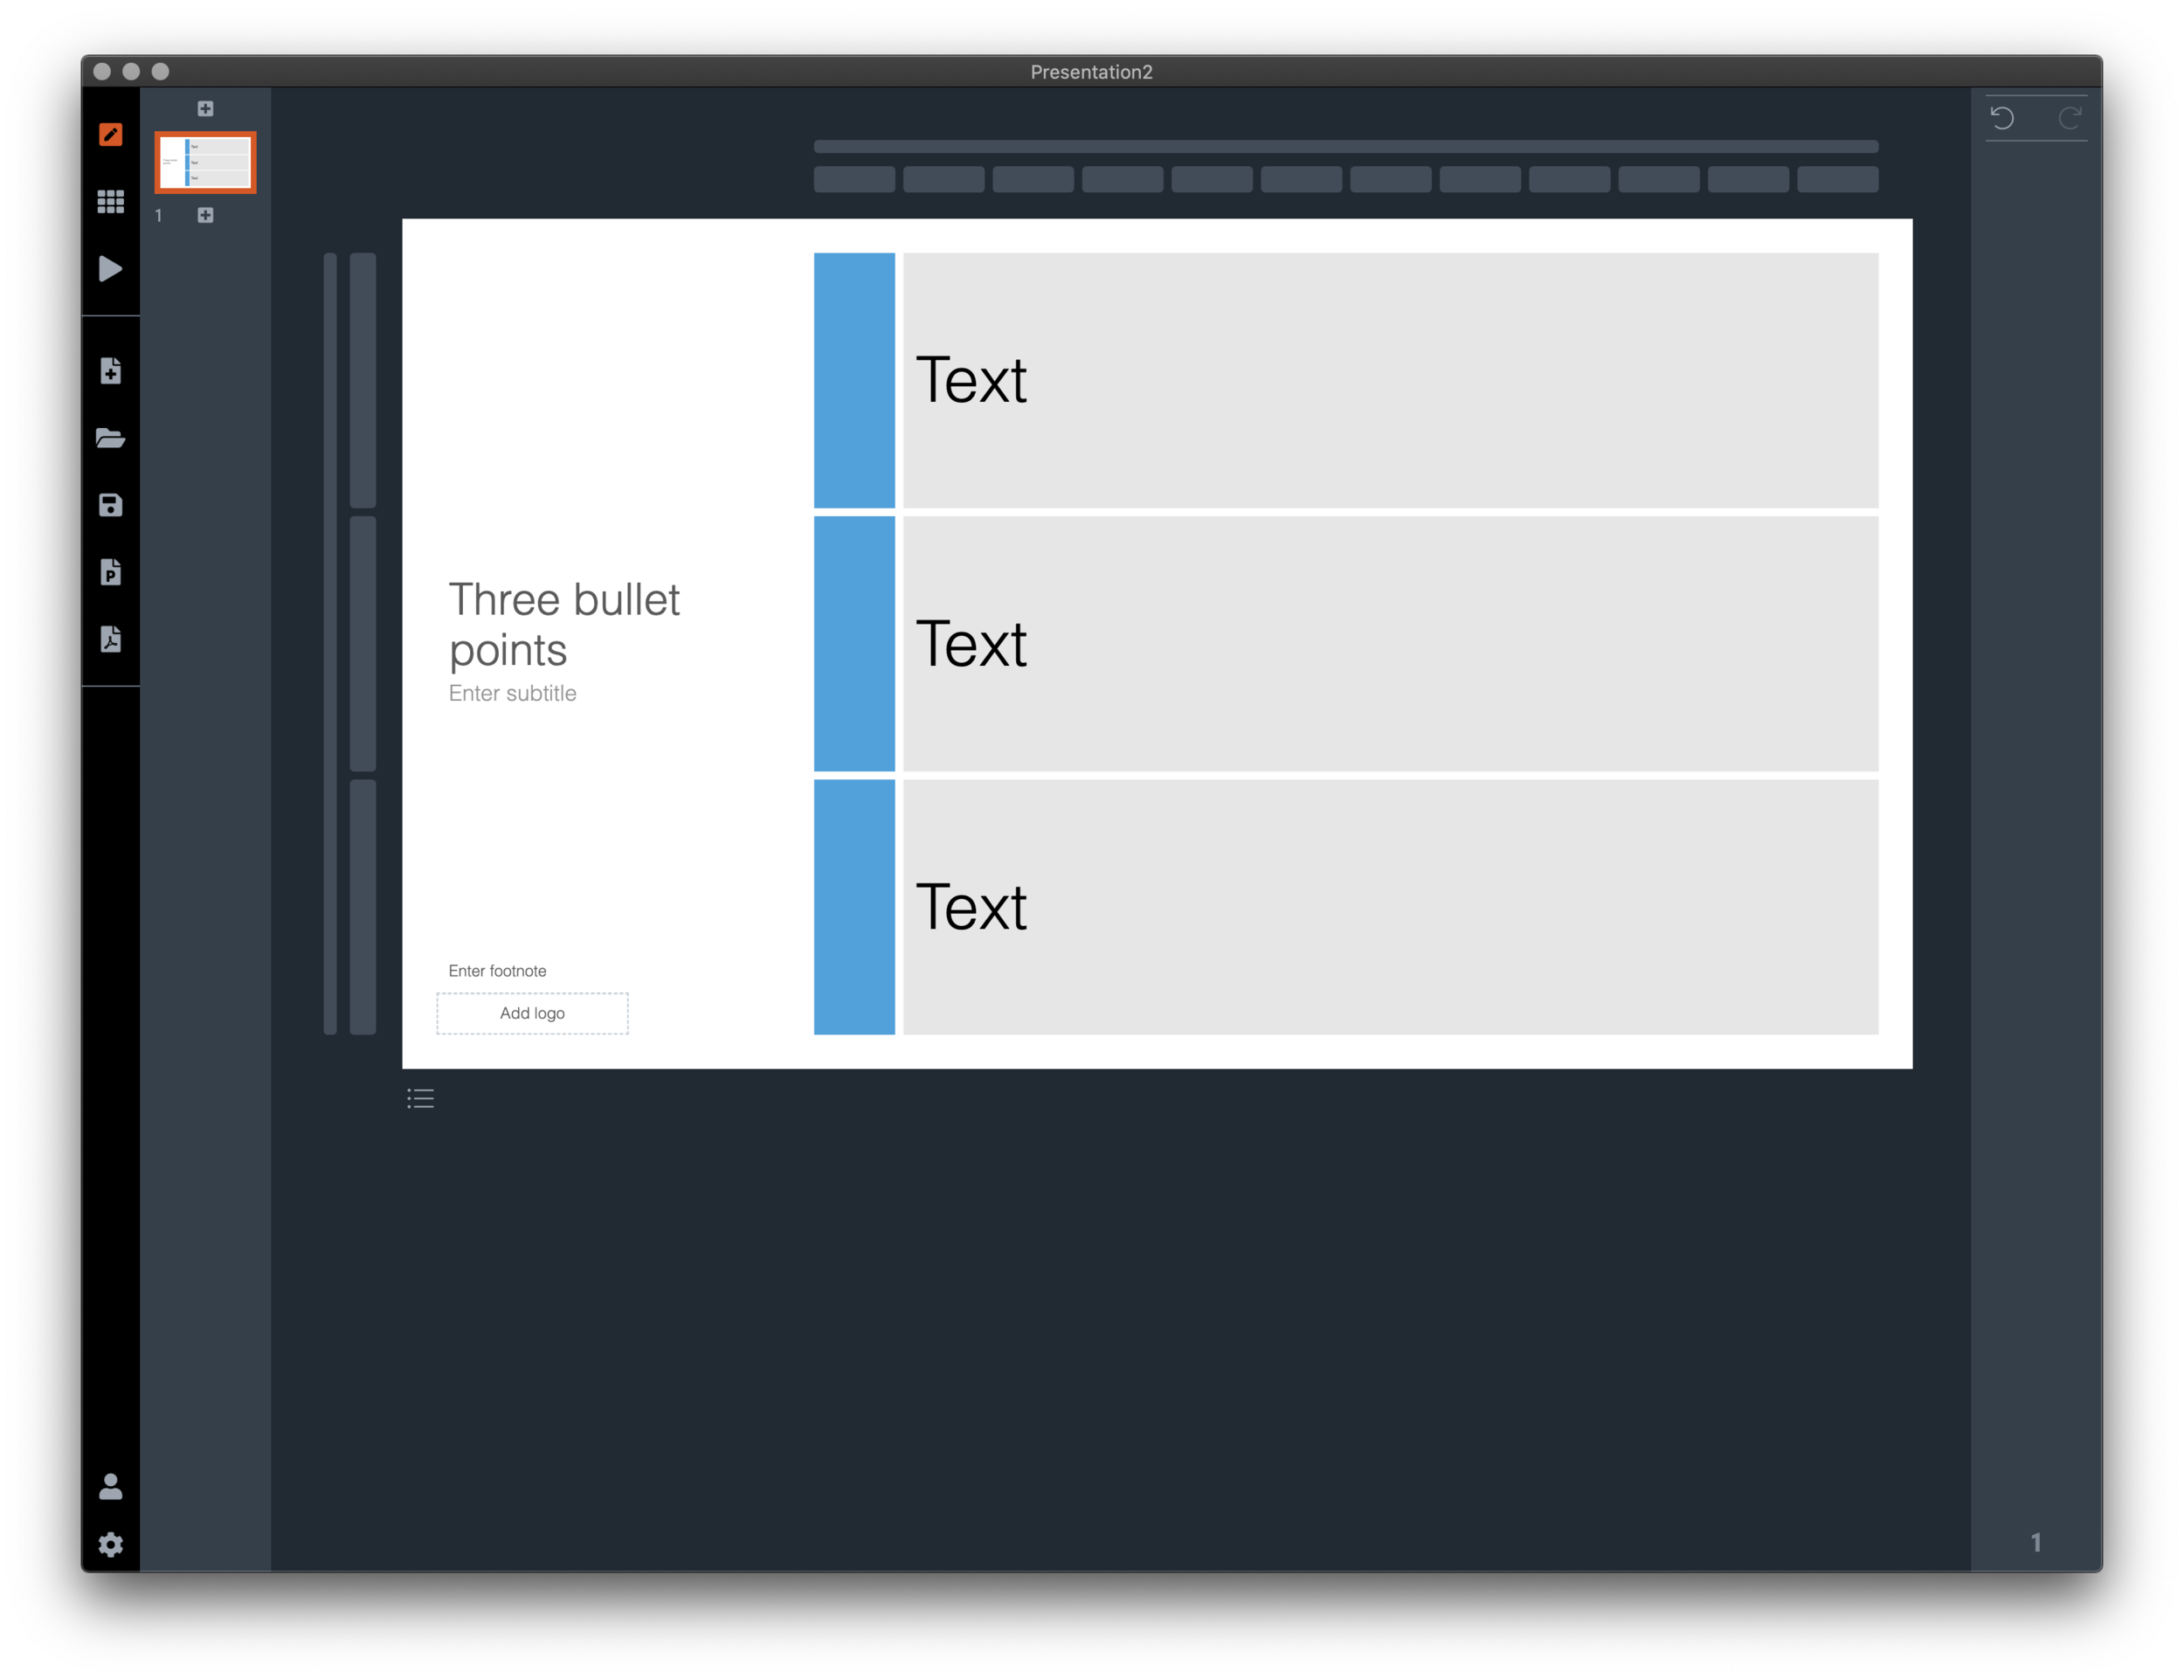
Pro subscribers can add the logo of their organisation by clicking the “add logo” box at the bottom of the slide.
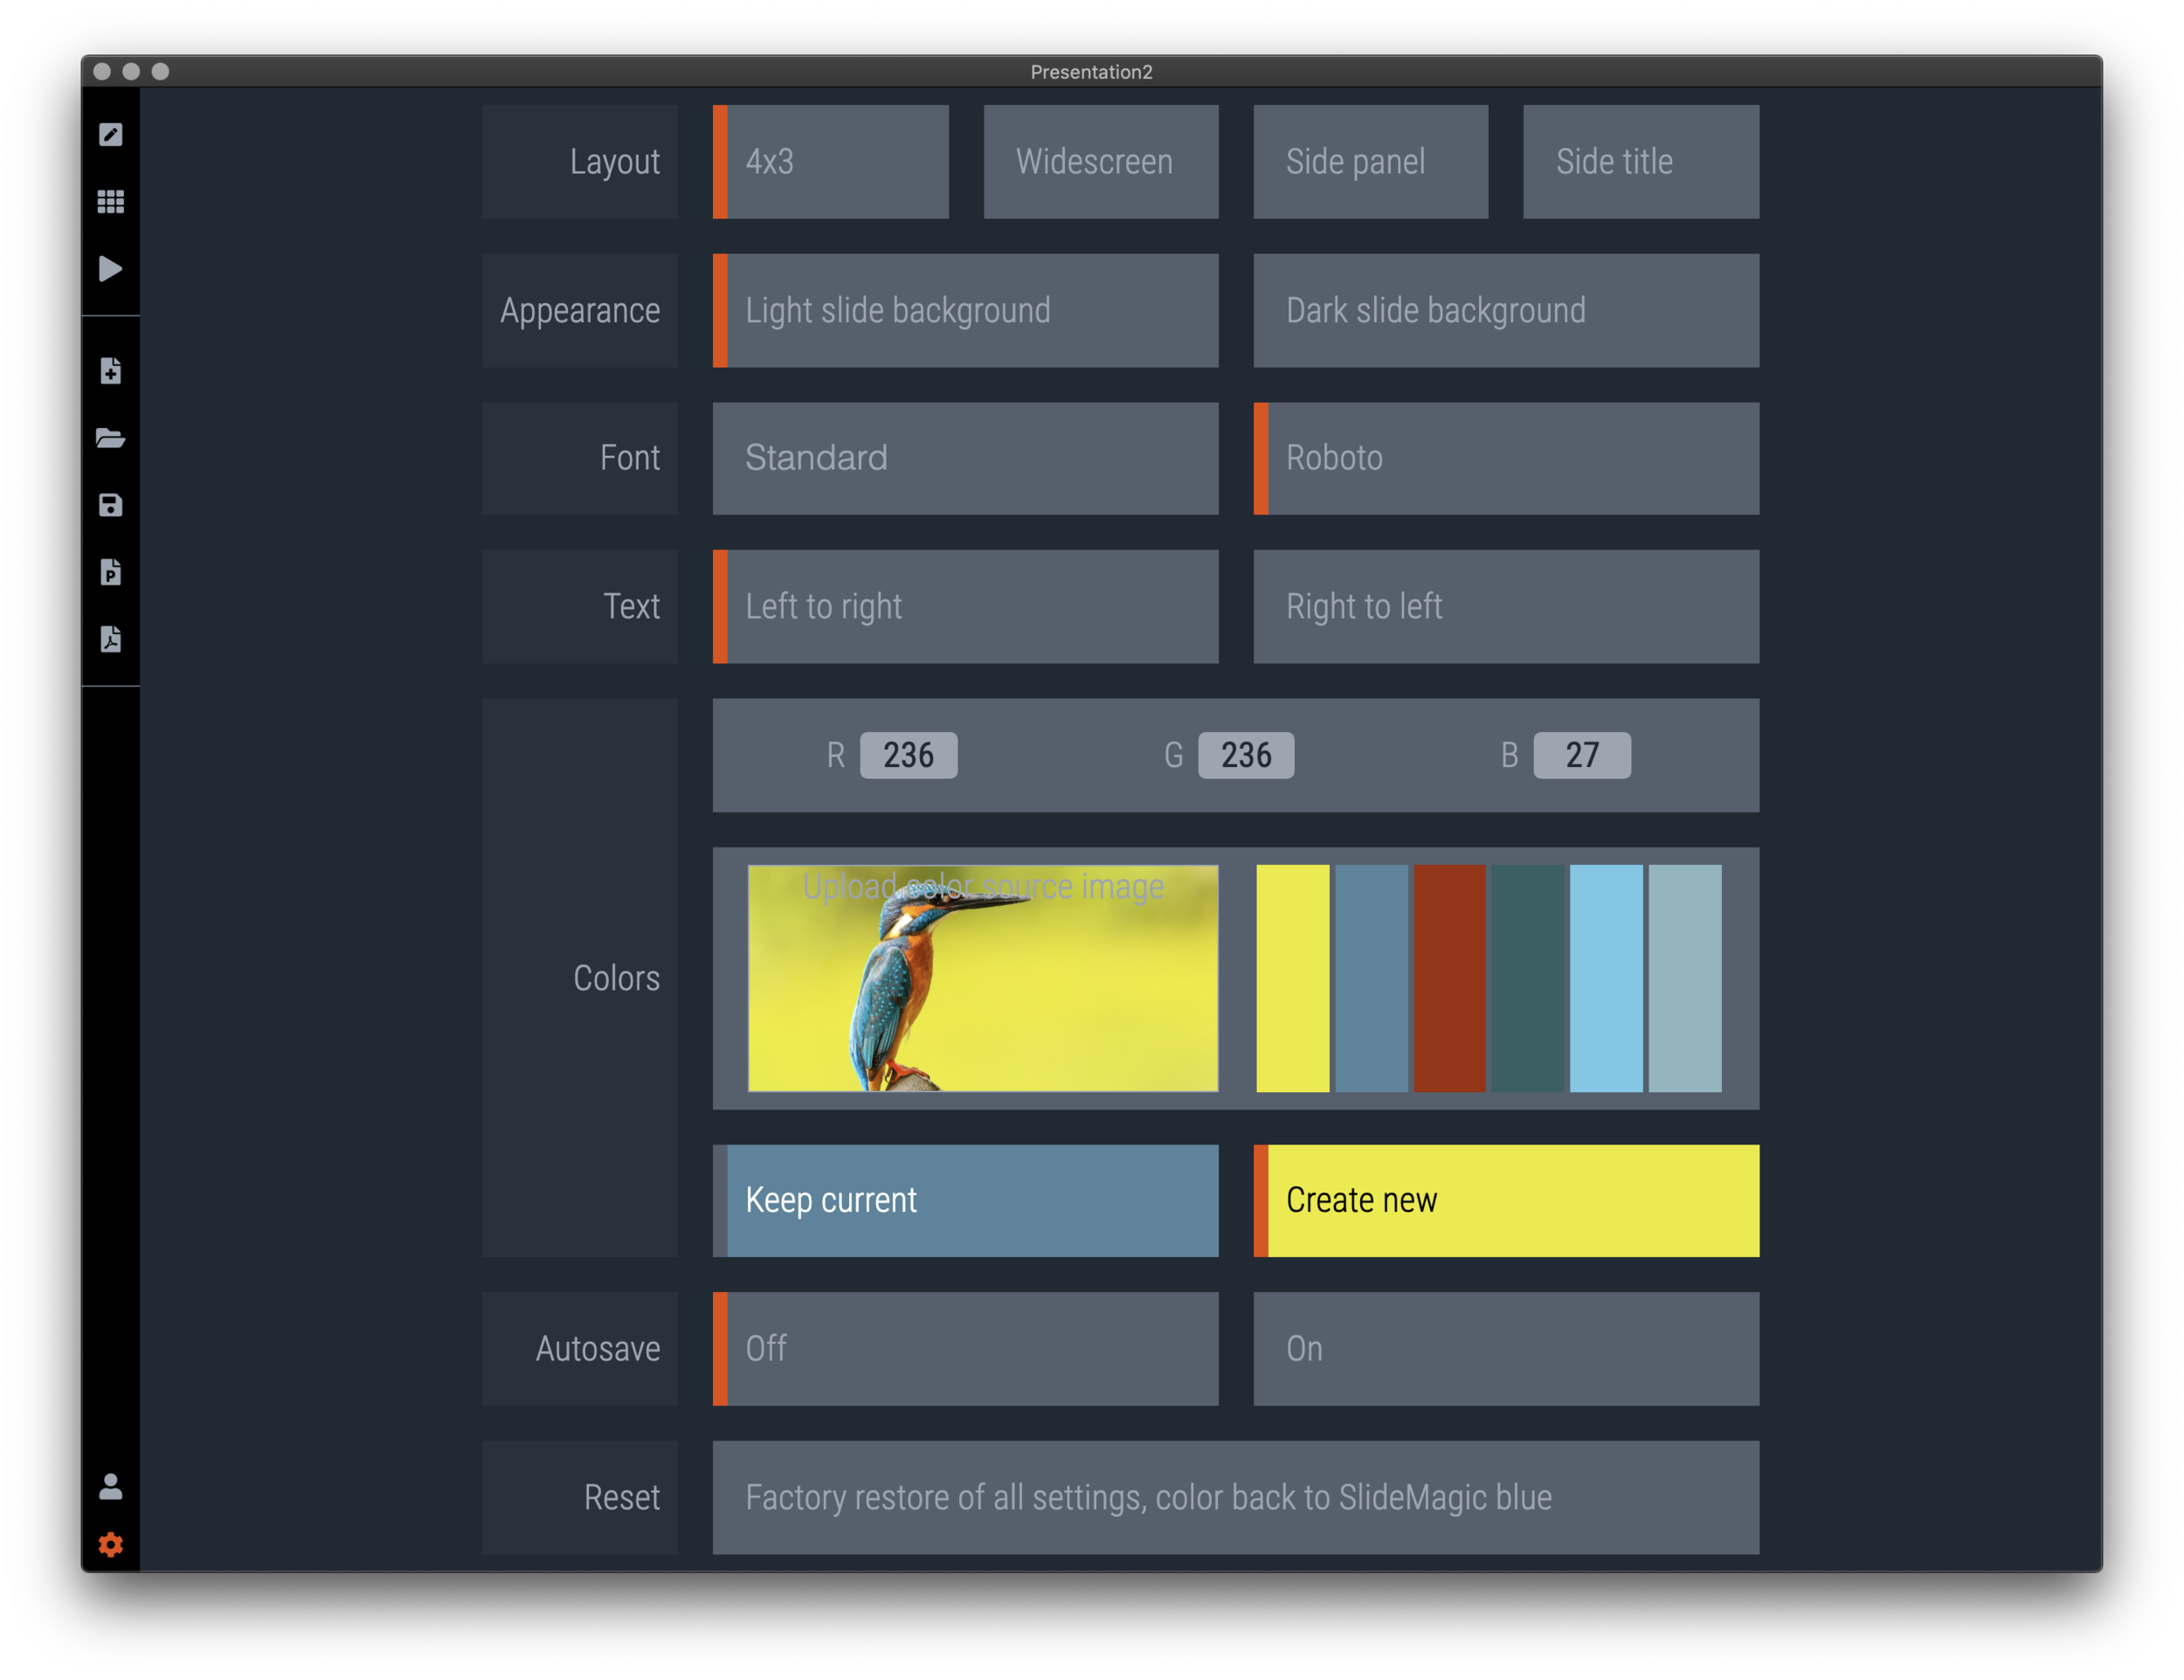
Set the accent colour of your presentation by either entering its RGB code, or picking a colour from an image that you uploaded

Pro subscribers can add their own logo at the bottom of the slide
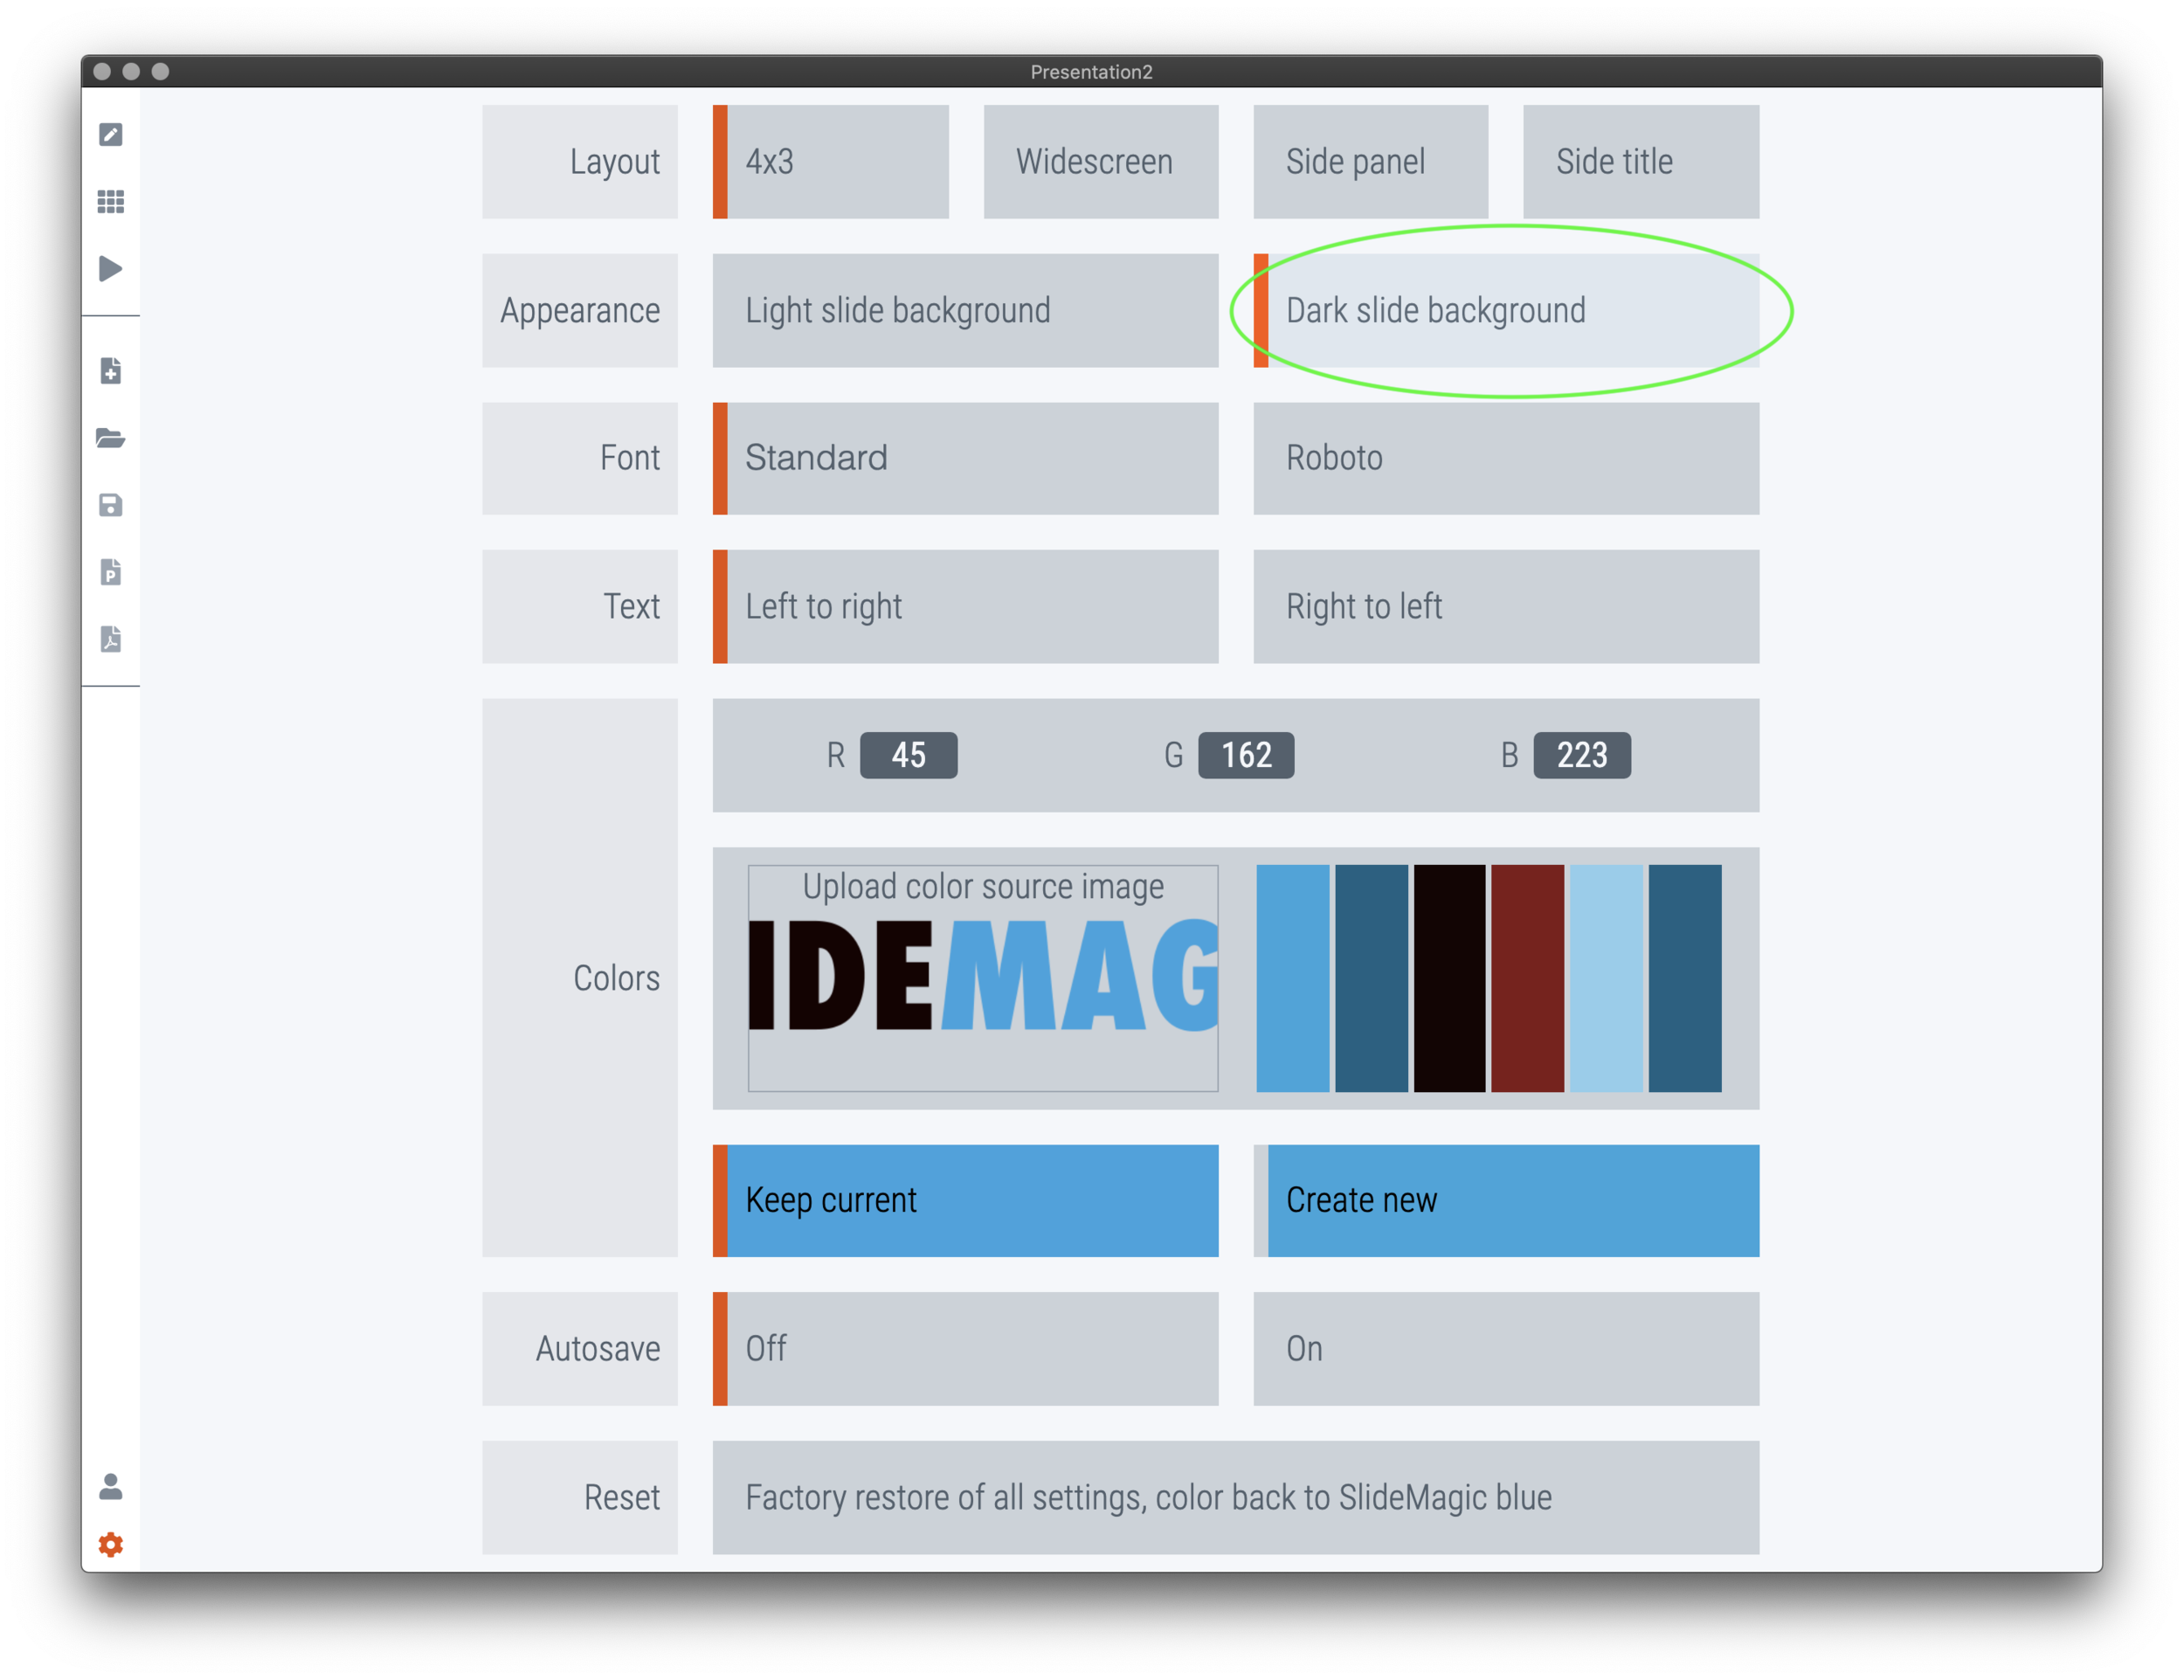
You can switch back and forth between a light and a dark slide background. Dark backgrounds might work better for large audiences, light backgrounds might work better for small conference rooms, or sending presentations via email. The application background will be the opposite of the slide background to keep a good working contrast.


Changing the slide aspect ratio
SlideMagic supports 4 different type of aspect ratios:
The traditional 4x3 monitor
The 16x9 widescreen option
A 4x3 slide, with a side panel where you ca put explanations in case you cannot present the slide in person
A scaled up 4x3 slide, but with the title on the side, creating a 16x9 layout
You can switch back and forth between each of the layouts in de settings window, or from the “view” drop down menu. All shapes and image crops will be adjusted without distortion

4x3 aspect ratio

16x9 aspect ratio

Side panel aspect ratio
Side title aspect ratio
Exporting to PowerPoint or PDF
Pro subscribers can export SlideMagic .magic files to PowerPoint (.pptx) or PDF files, either from the file dropdown menu, or by clicking the relevant icon in the left vertical menu bar
The view settings (aspect ratio, dark or light background) or also used for your PowerPoint or PDF file. If you are using the custom Roboto font, make sure that you have it installed on your local machine for it to show in PowerPoint (PDF will work in all cases).

Click on a box to change its appearance
Besides the boxes in the slide grid, there are two other slide elements that you can access, and give a colour and/or put an image background
The slide background which stretches the entire slide. To select it, click anywhere on the slide canvas that is not taken by another element
The slide “frame” that sits behind the grid boxes. To select it, click the thin horizontal and vertical selector bars in the edit window.
Access the slide background, or the slide “frame”

Select the slide background by clicking where it is not covered by another element. Place a background image in the same way as you do for a box in the grid.

Apply custom colours to the slide background

Select the slide “frame” by clicking the long and thin selectors that run across the slide.

Apply a colour to the slide frame. The slide frame cannot hold text, but you can add it in one of the grid boxes that sit on top of it.
A grid box in SlideMagic can be of three types:
Text box (including images)
Arrow box (left, right and up, down)
Data chart (bar, column, stack, waterfall)
Switch between the types clicking the relevant icon. Note that data will be lost if you switch between formats
Three different shape types: text boxes, arrows, and data charts

Text boxes with different colours and/or image backgrounds

Arrow boxes can have a horizontal or vertical direction

Data charts come as bar, column, stack, or…

… waterfall charts
When entering presentation mode on a system with 2 monitors, the presenter window will appear on one of the screens. This window has information for the presenter which is not visible to the audience.
Depending on the technical specification of your computer and external screen, you might have to switch the monitors (see the screen shot below).
SlideMagic responds to presentation remotes including the popular models produced by Logitech
Presenter view and speaker notes
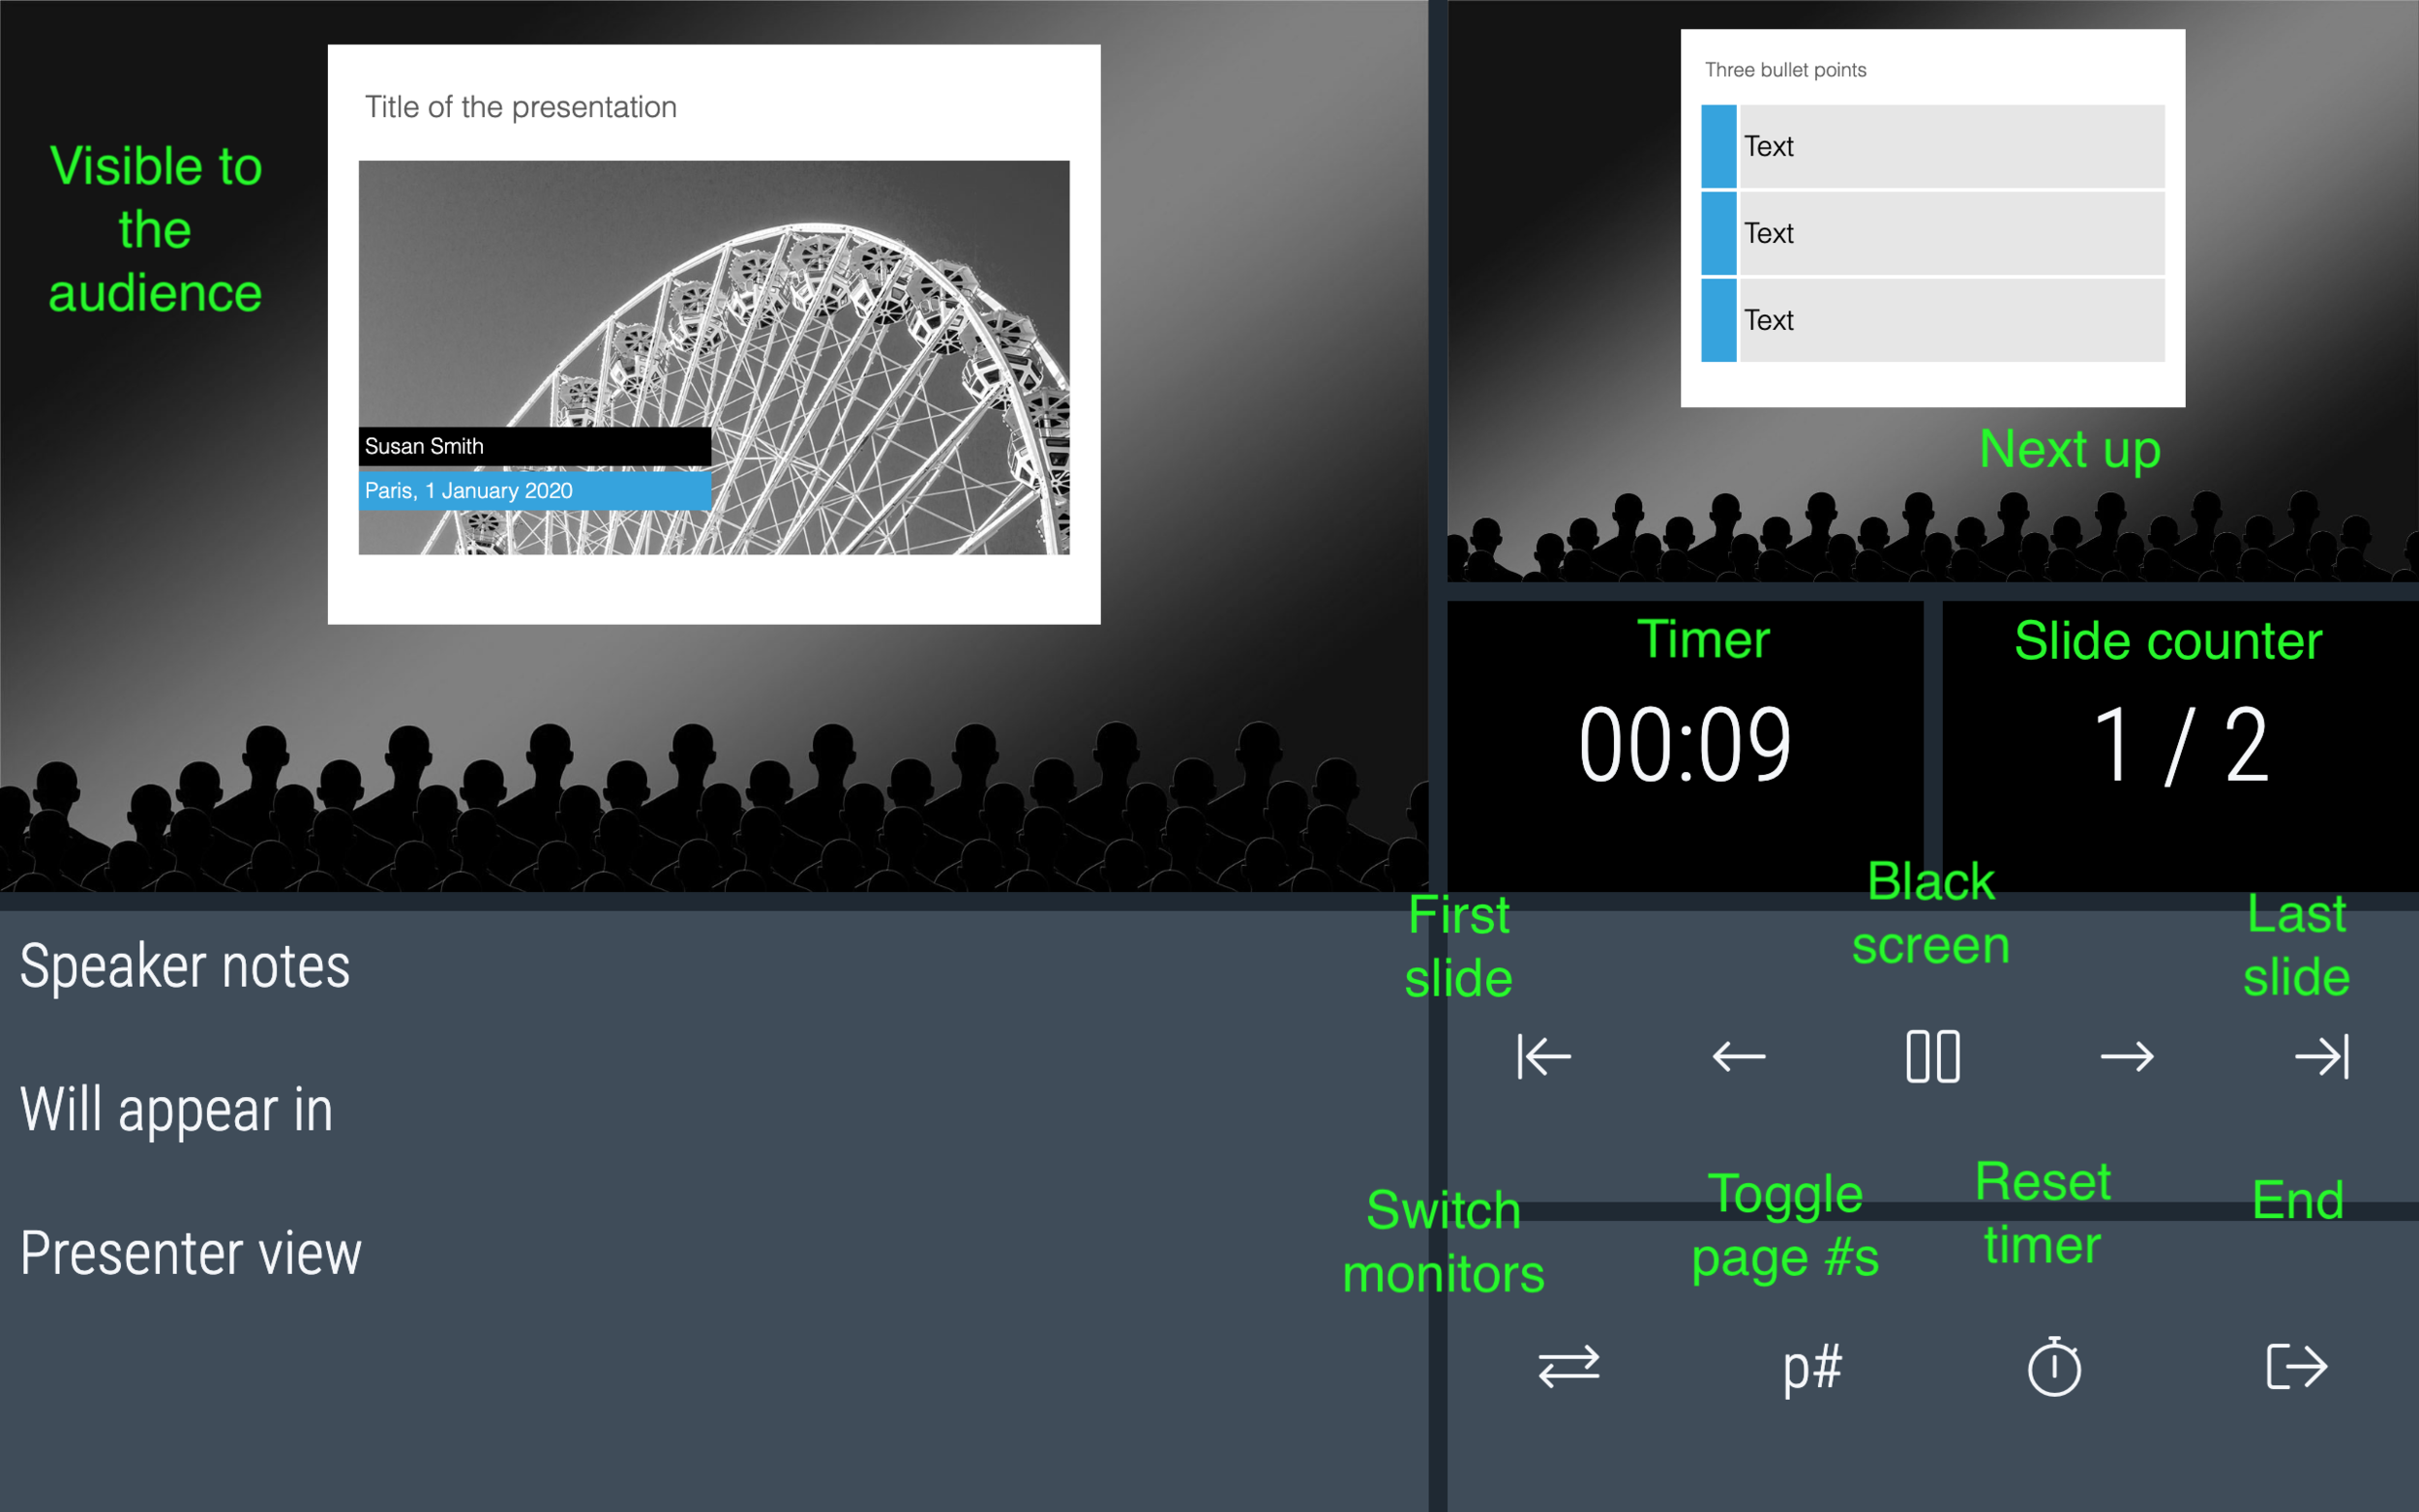
The presenter view window with extra information for the presenter

Click the icon at the bottom of the slide to go to the speaker note edit scree

Edit the speaker notes, press Escape to return to the regular slide editing screen
Below a list of handy keyboard short cuts for experienced users to make working easier and faster
cmd/ctrl means Command on Mac and Control on Windows
Keyboard shortcuts
Editing a slide
Story view
Presenting
escape
arrows
shift arrows
cmd/ctrl arrows
No focus: cmd/ctrl c, v, x
Focus: cmd/ctrl c, v, x
shift click
cmd/ctrl click
arrows
cmd/ctrl c, v, x
shift click
cmd/ctrl click
escape
arrows
b
Remove focus from a grid box, exit speaker notes edit
Move between grid boxes (without focus)
Expand grid box
Collapse grid box
Copy, paste, cut grid box
Copy, paste, cut selected text
Multi-select all grid boxes in the “square” between clicks
Multi-select a grid box
Move between slides
Copy, paste, cut slides
Select all slides between last clicked and current click
Multi-select a slide
Exit the presentation
Move between slides
Show/hide a blank screen to the audience
SlideMagic is a desktop application, but gets updated frequently. Normally speaking downloading and installing updates should happen in the background, you will receive a notification when a new version is ready to be installed.
To force an update, download the installer again and re-install the software. Your settings and file history should be preserved.
Installing updates
Still stuck? Contact support at [email protected]. EST + 7 hours, Sunday through Thursday